Shopper portal documentation
The shopper portal is the web server which is used by your clients, aka shoppers, to interact with the allpccloud web service. The terms “shopper portal” and “frontend” are used synonymical.
You can embed the shopper portal frontend via JavaScript API. To include the API into your website’s HTML code use the command
<script src="https://www.allpccloud.com/api/allpccloud_api_1.2.js"></script>
This command will create the allpccloud namespace which contains the methods:
allpccloud.Create(dom_configurator, username, params);
This method appends the configurator frontend to the DOM element dom_configurator. You must supply your allpccloud user name (username) and optionally a parameter object (params). This is the preferred way to embed the allpccloud web service into a website’s classic desktop- or tablet view.
allpccloud.OpenBrowserTab(username, params);
Opens a new browser tab and shows the allpccloud web service frontend there. You must supply your allpccloud user name (username) and optionally a parameter object (params). This is the preferred way to embed the allpccloud web service into a website’s mobile (phone) view.
The following members can be supplied to the parameter object (params) :
width – width (pixels) of the configurator frontend (ignored when shown in own browser tab)
height – height (pixels) of the configurator frontend (ignored when shown in own browser tab)
forcelang – Overrides the language settings of the configurator frontend (Example: forcelang: “en” for english, forcelang: “de” for German etc.). If not supplied the frontend makes use of the current browser language settings.
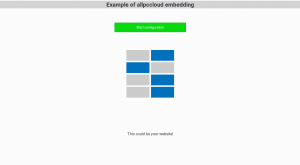
Here is a simple HTML example file:

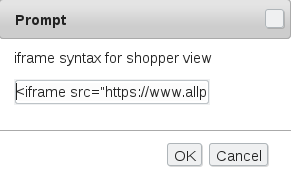
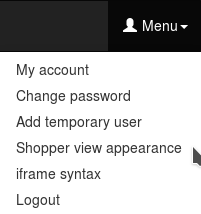
Another possibility is an <iframe>. To get the correct iframe syntax, choose the following menu item in the web portal:

A popup dialog will show the HTML code you will need to embed the shopper portal in your web presence. Eventually consult your web designer who should definitely be able to build the <iframe> into your web presence.
Additional setup
To provide seamless integration into your website you can setup some basic color styles, a title image and the language. Back in the web portal, select “Shopper view appearance” from the menu:
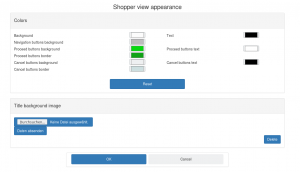
Here you can adapt the shopper portal coloring according to your hosting web page. You can also upload a title image (PNG) which the shopper sees first when he or she is on the page, along with a “proceed”-button that starts the configuration process (see example screen below).